Configuring Frida with BurpSuite and Genymotion to bypass Android SSL Pinning
Summary
If you are into Bug Bounty programs and you are not looking into their mobile apps, then you are missing a lot of juicy stuff. Yeah it’s ok to use automated scanners but 90% of these scanners only do static analysis. By doing dynamic analysis on a mobile app we have the chance to discover high severity bugs such as authentication and authorization flaws, content spoofing, memory leaks, application logic flaws, and cross-site scripting. In modern mobile apps there is a technique implemented and it’s named SSL Pinning. This technique is used in the client side to avoid man-in-the-middle attack by validating the server certificates again even after SSL handshaking. This can be bypassed using different techniques but in this blog we are going to use Frida and BurpSuite, because it’s easier and faster.
Requirements:
BurpSuite Community or Pro https://portswigger.net/burp
Frida pip install Frida pip install frida-tools
Genymotion + Virtual Box https://www.genymotion.com/ https://www.virtualbox.org/
Steps:
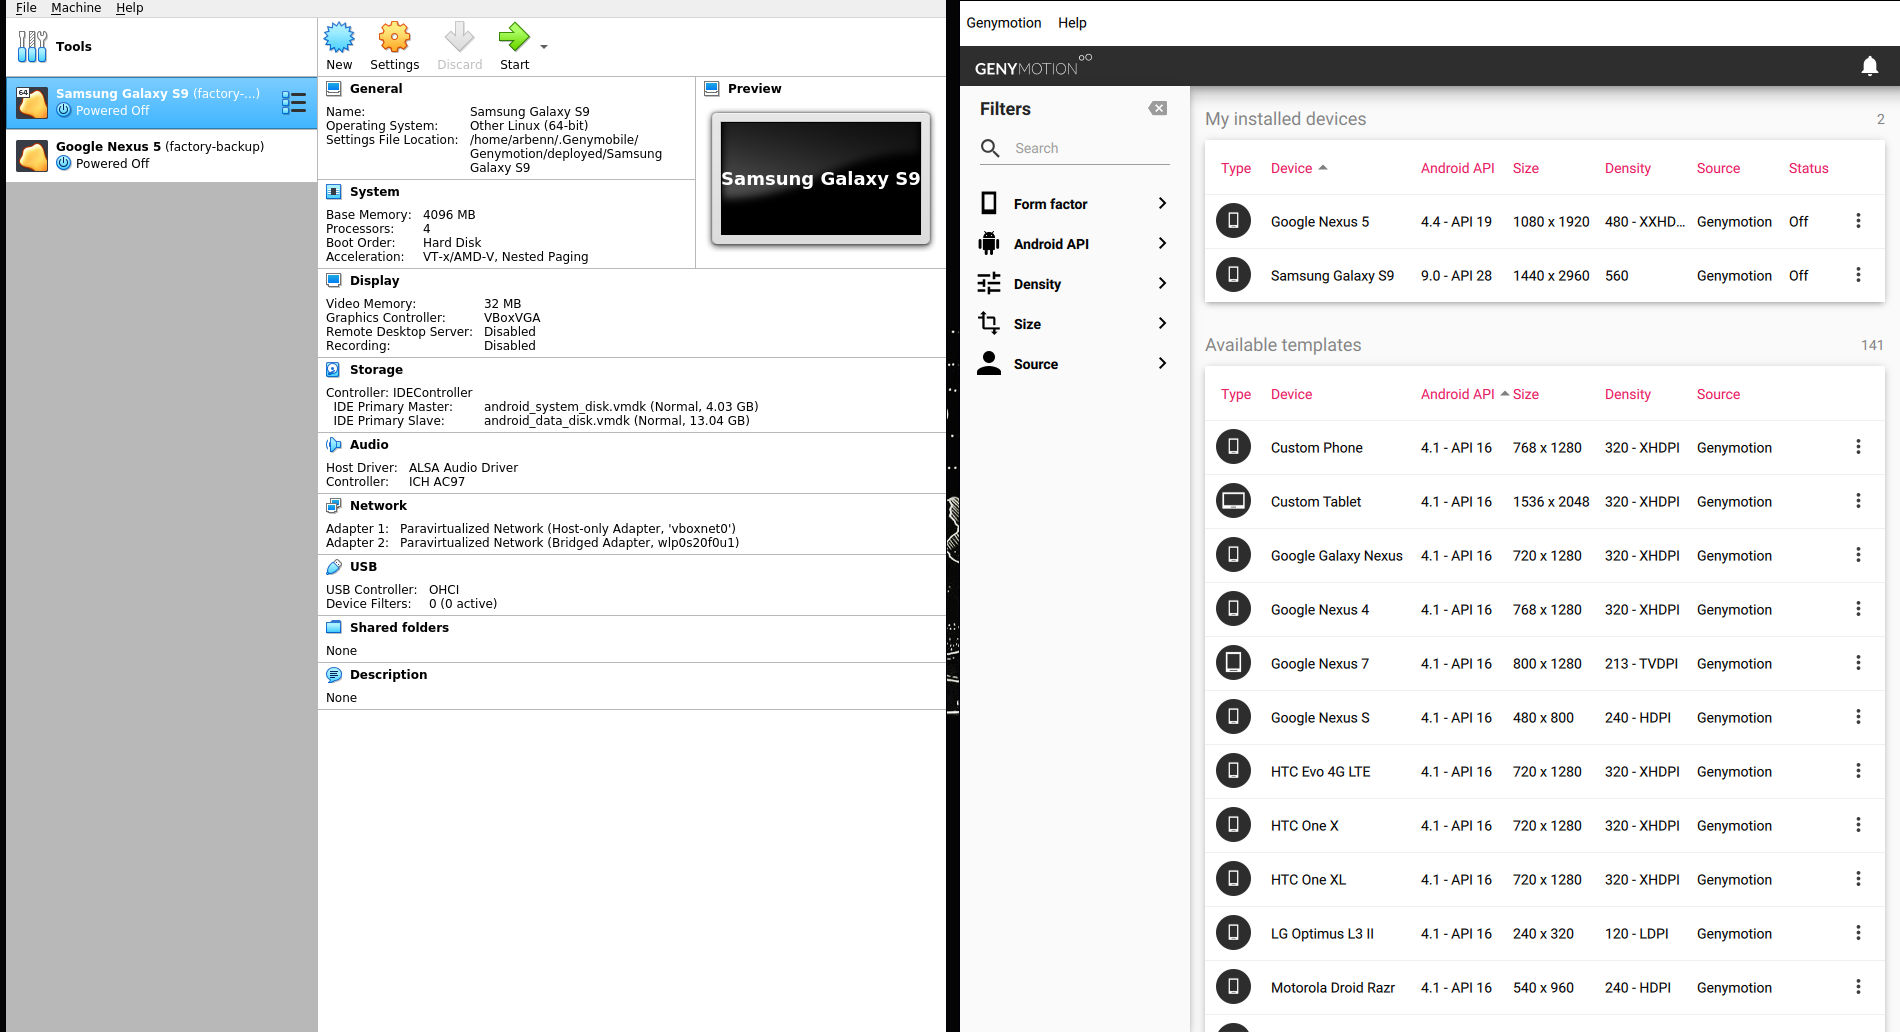
After you create a GenyMotion account, you can procced to install your device with custom OS. For this writeup we are going to use Galaxy S9 with android 9.0 and bridged networking like it’s shown in the image below.
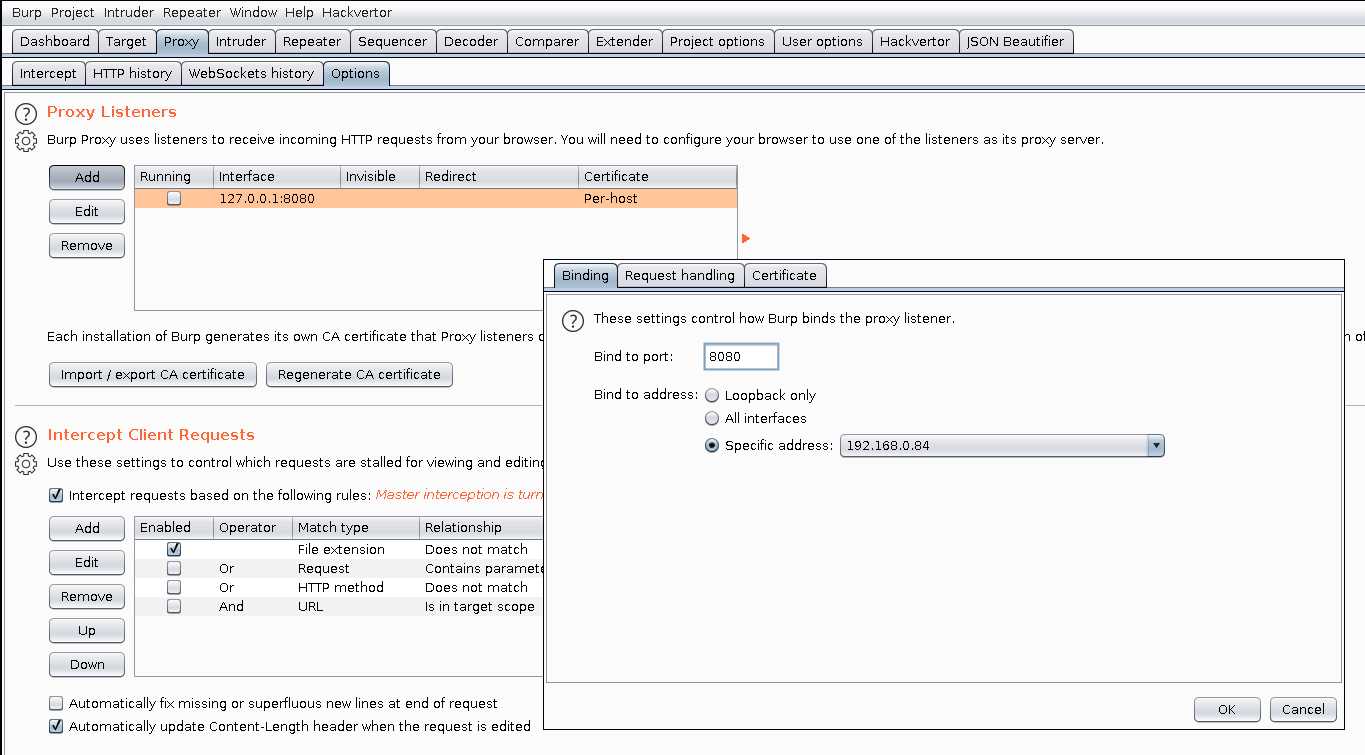
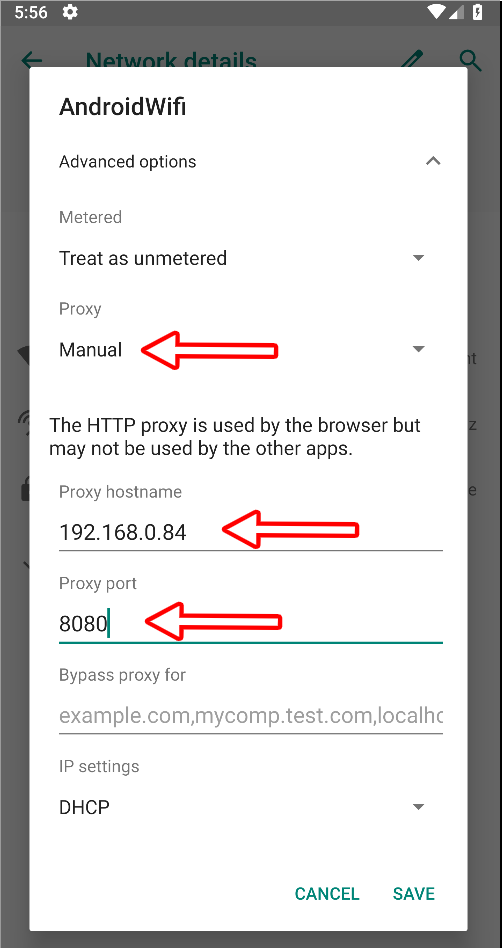
By default BurpSuite proxy listens on 127.0.0.1:8080, we should change this to listen on a different interface that can be accessed from other devices in your network. I will configure it to listen on interface 192.168.0.84 and port 8080 like it’s shown in the image below.
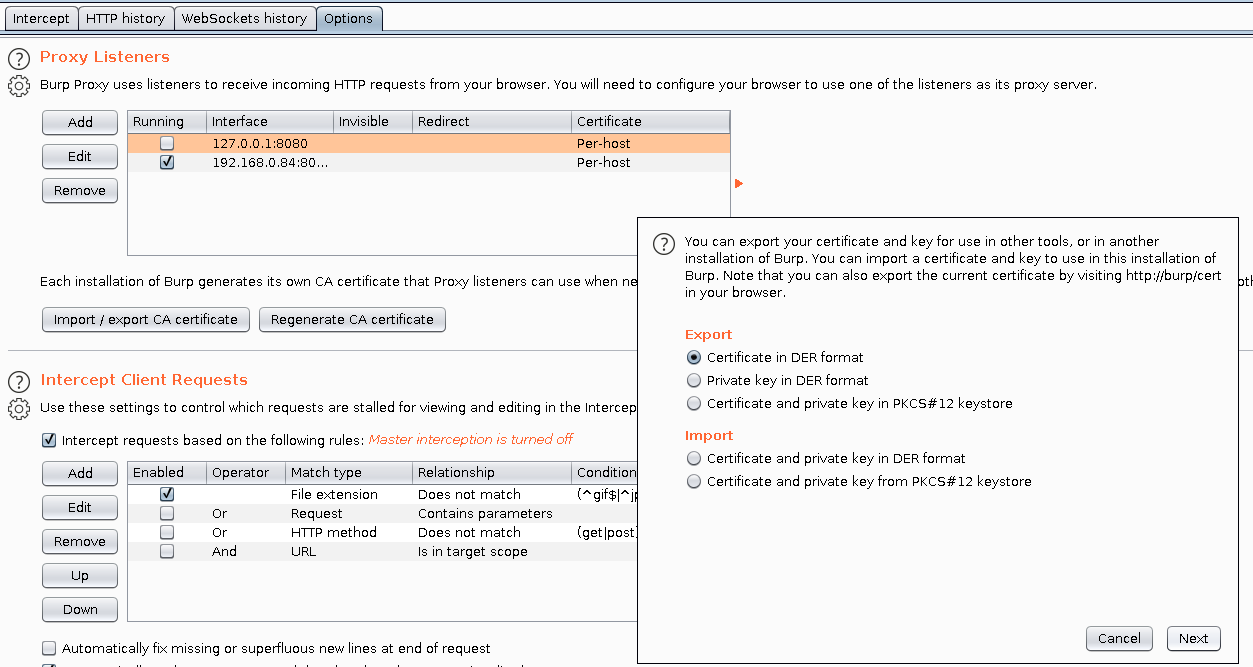
In order to intercept traffic with BurpSuite we need to export its certificate and then install it in our android device. The default extension is .der but our android device accepts only .cer format, so while exporting make sure to save it as cacert.cer.
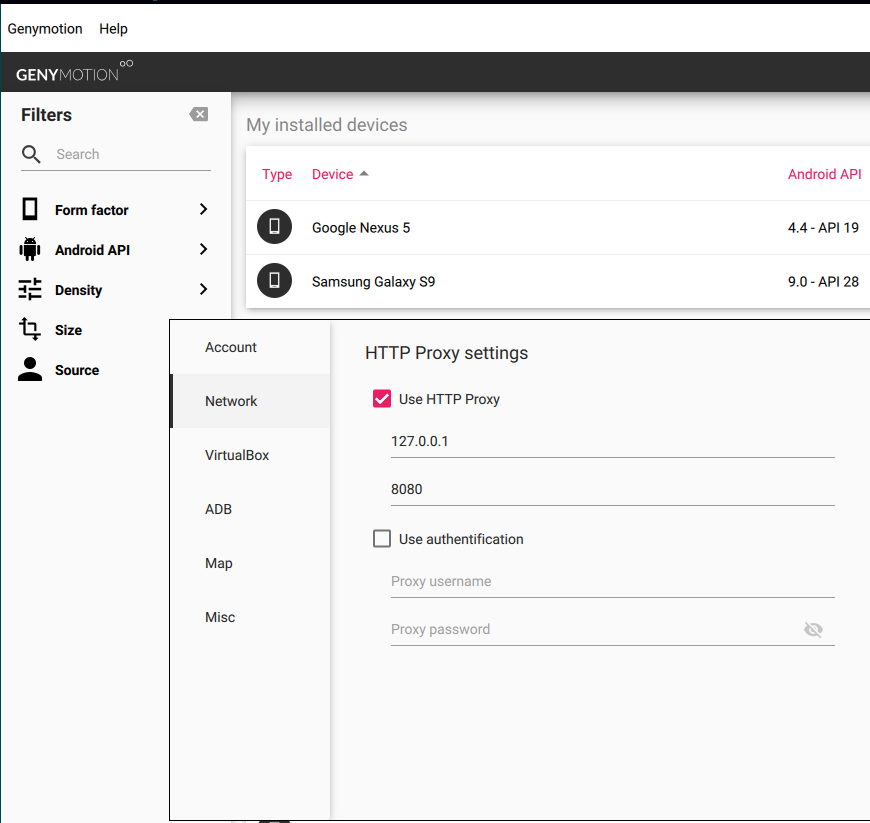
Before configuring proxy on our android device, we should edit proxy settings on GenyMotion too.
Settings -> Network -> Use HTTP Proxy -> 127.0.0.1:8080
Genymotion has it’s own adb tools included that operate only with the devices running on its emulator. In my system these tools are located on /opt/genymotion/tools/, if it’s not the same location in your system, you can search with the command below.
find / -type d -name “genymotion” 2>/dev/null
Now we can proced to install the cacert.cer in our device. We can use adb tools to upload it then manually install it.
$ /opt/genymotion/tools/adb push ~/Downloads/cacert.cer /sdcard/Download/
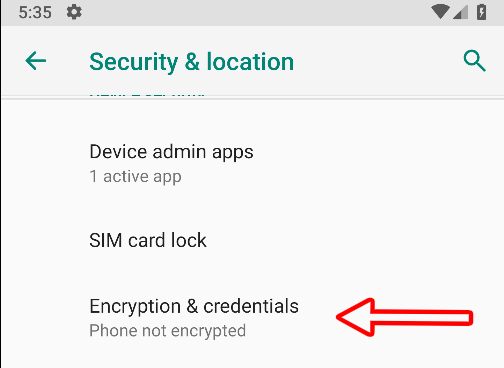
Navigate to Settings -> Security & Location -> Encryption & Credentials
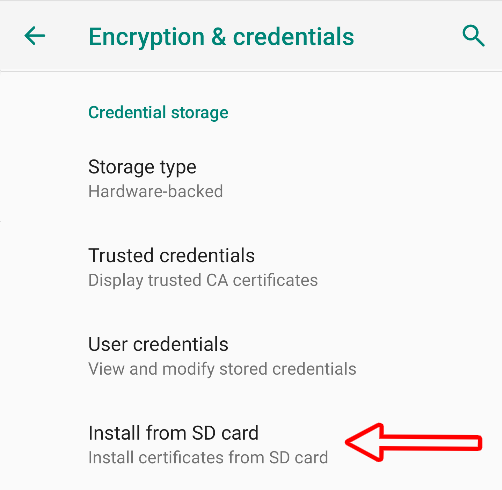
Click on Install from SD Card and locate cacert.cer (We earlier put it into /sdcard/Download/)
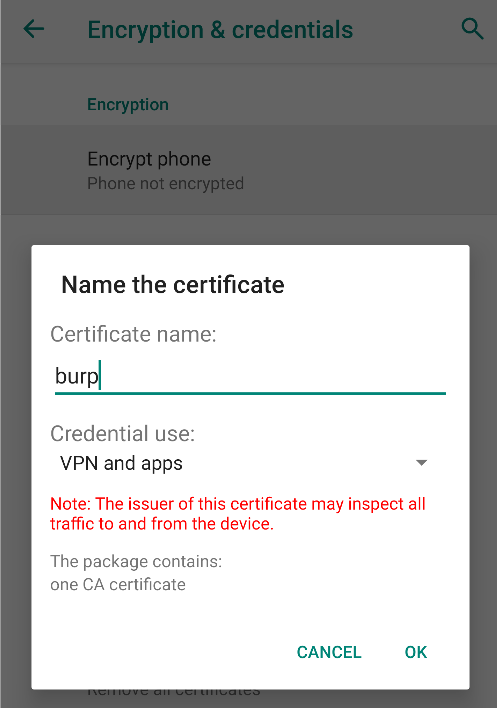
Then you can name it how you want, in my case I’ll name it burp.
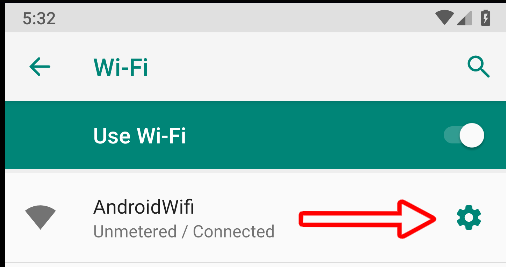
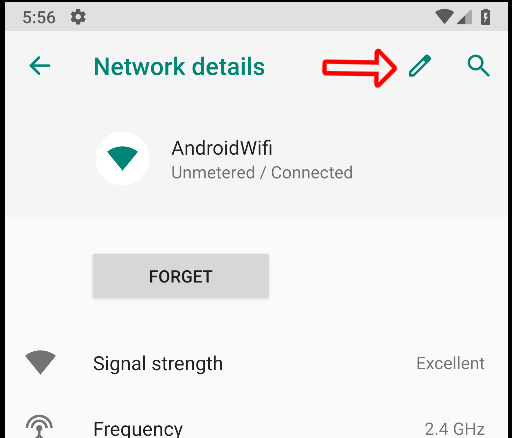
The last thing left to configure on our device is the wifi proxy, we can do that following the images below.
Burp and Genymotion are configured, it’s only frida left. But what does Frida exactly do? Frida lets you inject snippets of JavaScript or your own library into native apps on Windows, macOS, GNU/Linux, iOS, Android, and QNX. It also provides you with some simple tools built on top of the Frida API. These can be used as-is, tweaked to your needs, or serve as examples of how to use the API. For this writeup we will use this javascript file as bypass.
/*
   Universal Android SSL Pinning Bypass
   by Mattia Vinci and Maurizio Agazzini
*/

Java.perform(function() {
    var array_list = Java.use("java.util.ArrayList");
    var ApiClient = Java.use('com.android.org.conscrypt.TrustManagerImpl');

    ApiClient.checkTrustedRecursive.implementation = function(a1, a2, a3, a4, a5, a6) {
        // console.log('Bypassing SSL Pinning');
        var k = array_list.$new();
        return k;
        }
}, 0);
In order for your machine and android device to communicate, there is a frida-server that we should put into /data/local/tmp/. If you go to this repo, you’ll see that there are different servers made for specific arch-s.
It’s easy to determine what server we should use. By executing the command below, we can identify our android device architecture.
$ /opt/genymotion/tools/adb shell getprop ro.product.cpu.abi
x86
Now that we know it uses x86 arch, we can download the x86 server from here
- wget https://github.com/frida/frida/releases/download/12.7.20/frida-server-12.7.20-android-x86.xz
- unxz frida-server-12.7.20-android-x86.xz
- mv frida-server-12.7.20-android-x86 frida-server
Lets push frida-server and BurpSuite cert to our device.
- /opt/genymotion/tools/adb push ~/Downloads/cacert.cer /data/local/tmp/cert-der.crt
- /opt/genymotion/tools/adb push ~/Downloads/frida-server /data/local/tmp
- /opt/genymotion/tools/adb shell chmod 777 /data/local/tmp/frida-server
- /opt/genymotion/tools/adb shell /data/local/tmp/frida-server &
We have uploaded the files and we have started the server in background
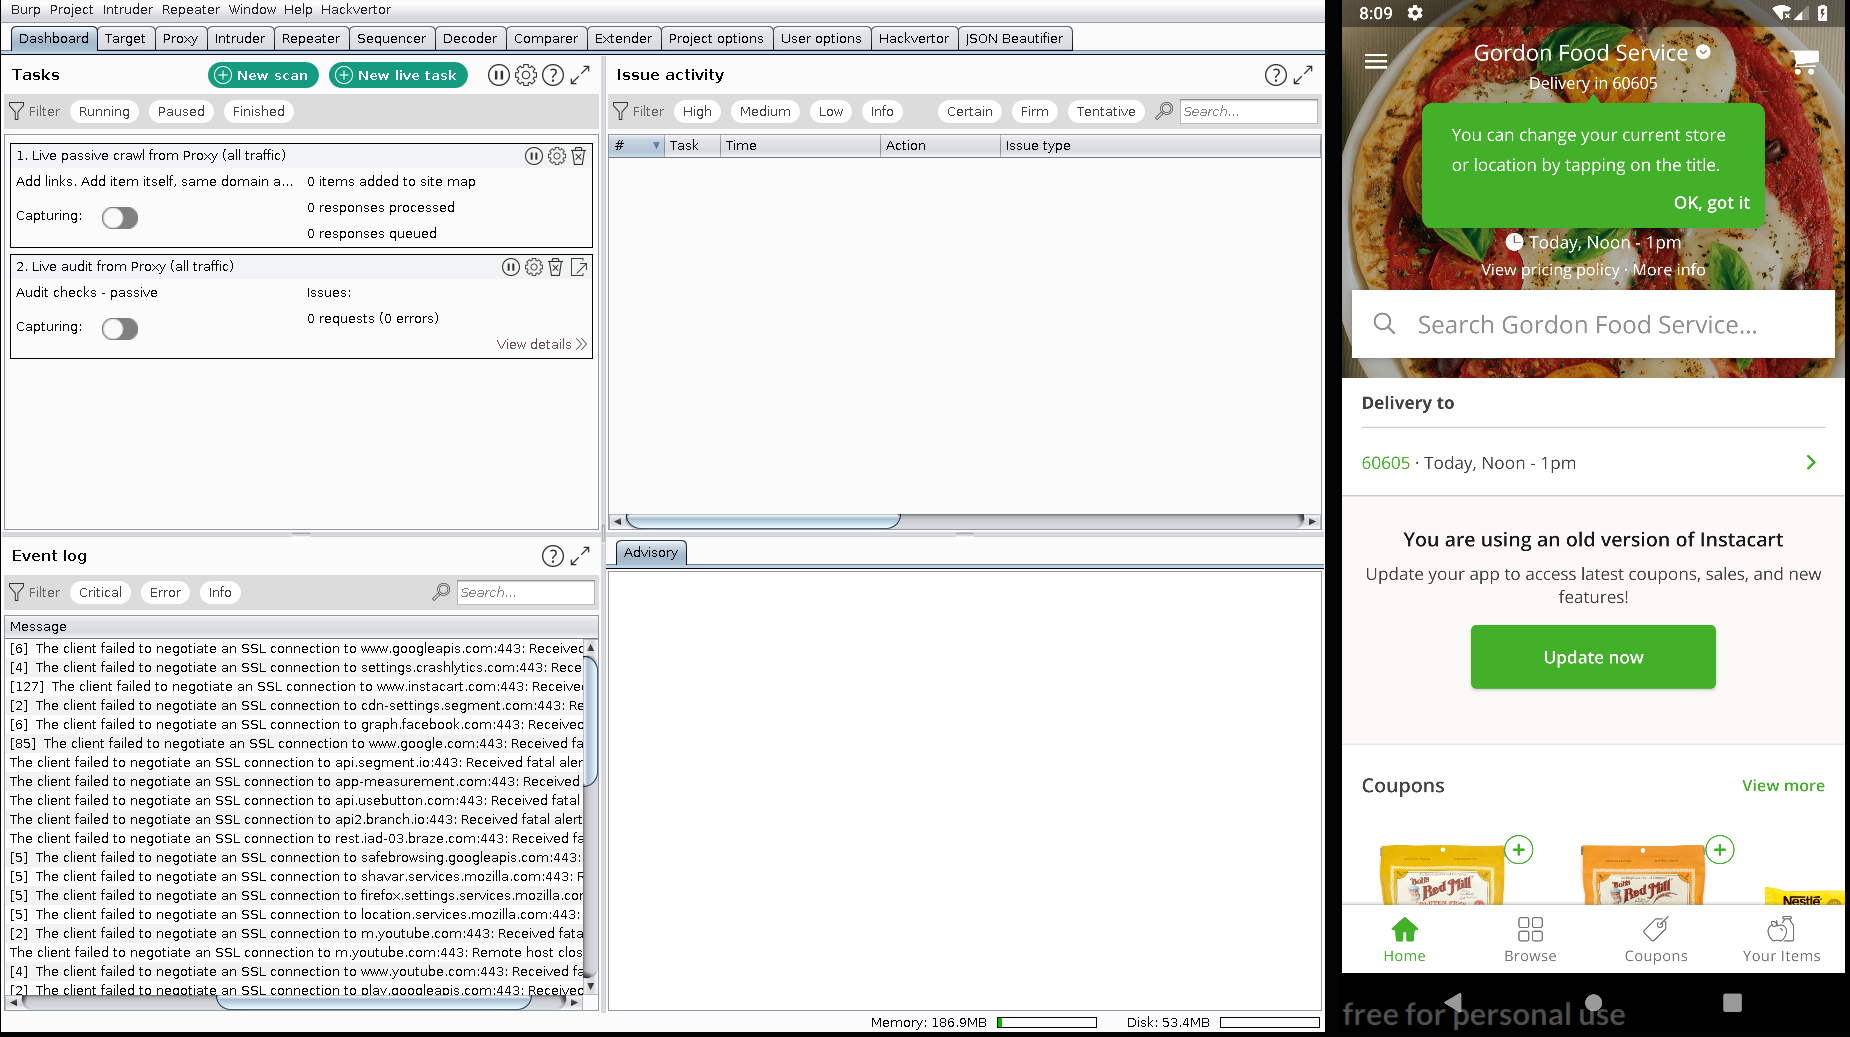
Before using the bypass-ssl-frida.js script we should start the app that we want to intercept traffic then execute the command below to get its package name. For this writeup, I’m using Instacart just for demonstrating purposes.
$ frida-ps -U | grep instacart
com.instacart.client
Lets check BurpSuite if it outputs any error for ssl.
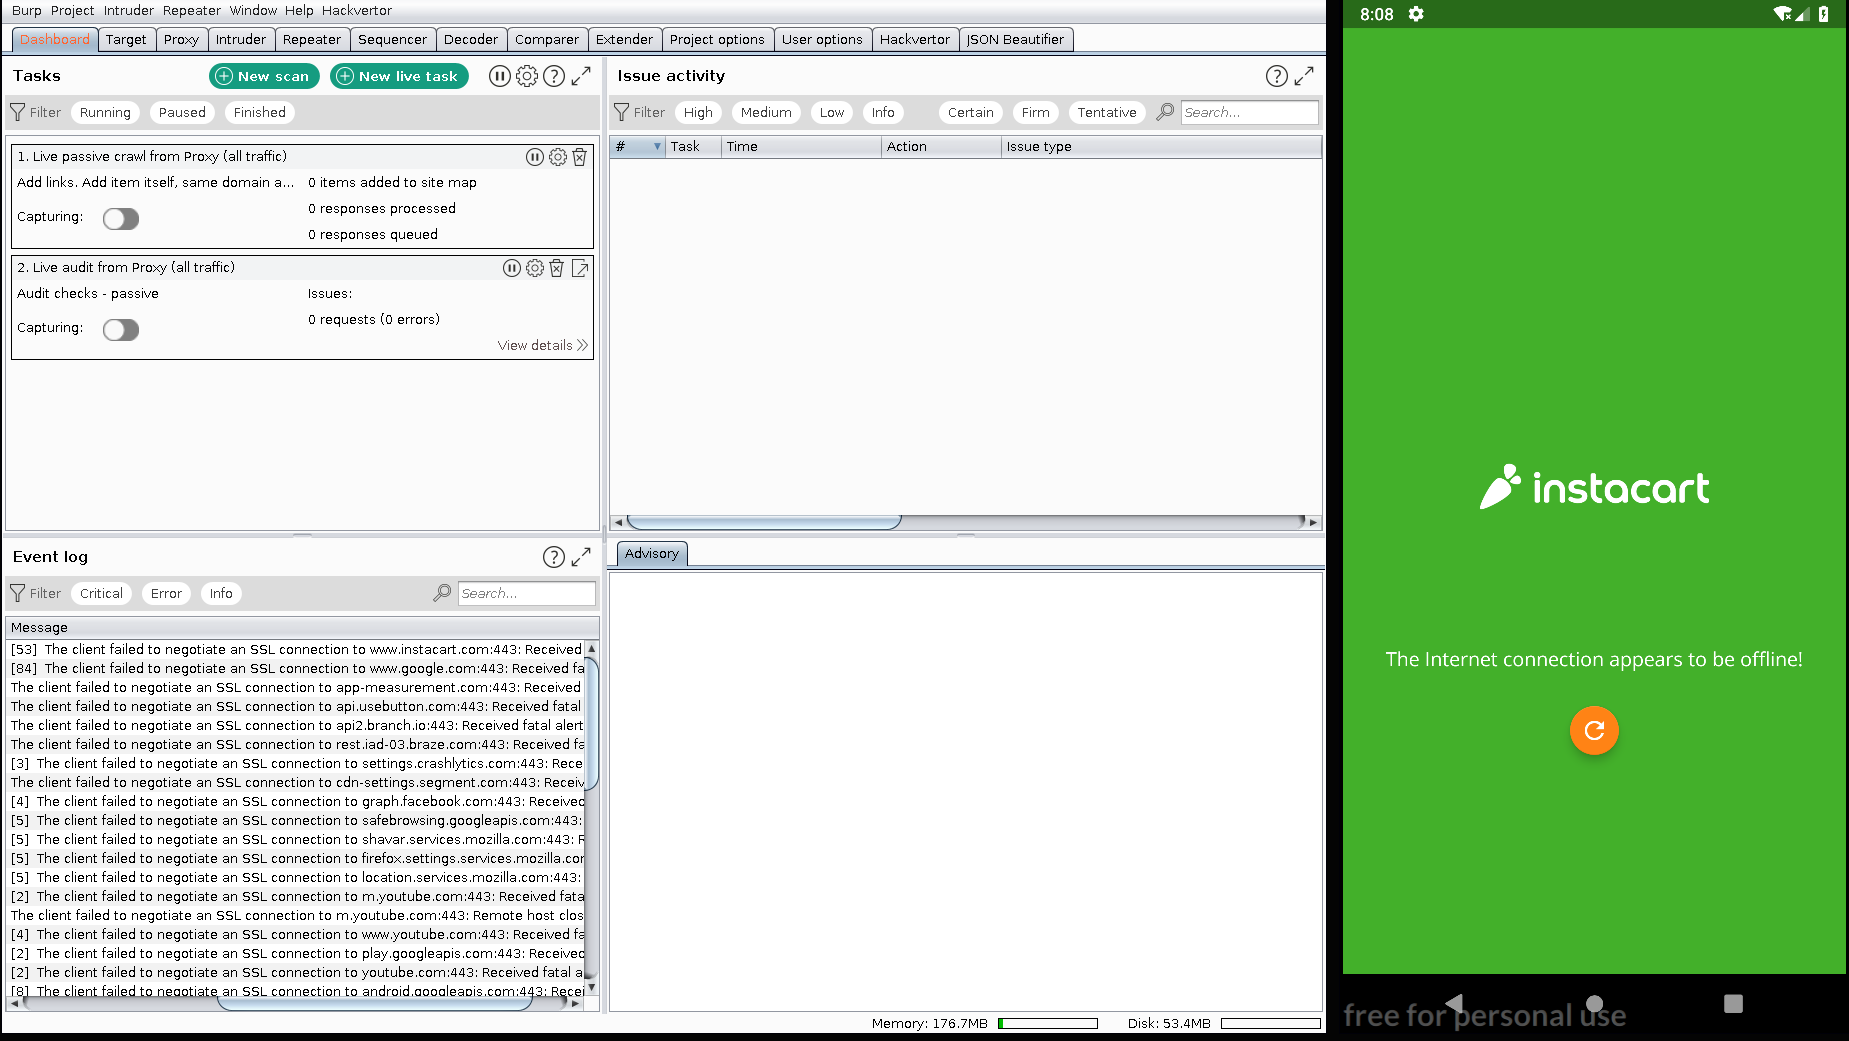

It seems that the application can’t connect to the internet due to ssl pinning, but if we execute the command below then it will bypass it.
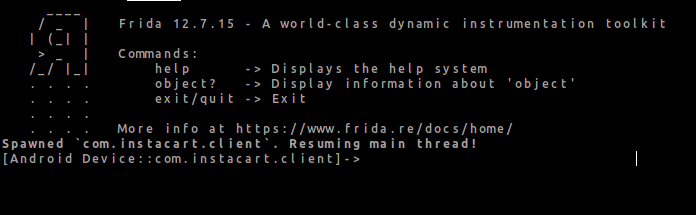
$ frida -U -f com.instacart.client -l ~/Downloads/bypass-ssl-frida.js –no-pause
Now we can continue testing our prefered application with BurpSuite or your favourite web proxy.
Thank you for reading this and I hope that you’ll find it helpful